Wednesday, September 16, 2015

how to: drying flowers


As much as I love receiving flowers, it always makes me sad when they inevitably die after a week or so. After receiving flowers from loved ones that I just did not want to part with, I decided to try to dry out my bouquets in order to keep them as memories. Although some people think that dead flowers are a creepy keepsake, I find them to be a pretty reminder of the memory of receiving them.  

After a recent family wedding, I decided to dry out my bridesmaid's bouquet and it turned out really well! All I did was take each stem and tie it/pin it upside down. I pinned some to my cork board (this was really simple, but it was slightly difficult to keep them in place) and I hung others by a string from a drying rack. Both techniques worked well for me, and I will definitely use these methods to dry out any flowers I receive in the future! 


And now I have these dead, yet very pretty flowers in a vase in my bedroom to remind me of the wedding!! :-)

Tuesday, September 8, 2015

vintage tea cup essential oil wax candle up for sale on my etsy shop!

Hello friends!!
I've just posted a new item on my etsy shop :-)

I have a blog post from last april explaining how I made this DIY tea cup candle. Feel free to follow along with the tutorial or visit my etsy shop to purchase this item for only $10.00! There is only one of this item, so hurry up & get it before it's gone! 


current makeup favorites


1. Urban Decay Naked Basics Eye Shadow Palette - $29

I typically use 'naked 2' in my crease, 'foxy' or 'wos' over the lid, 'venus' as an inner corner & brow bone highlight, then a mixture of 'faint' and 'crave' to fill in my brows. 


2. Revlon Colorstay 24 hr 200 Nude (normal/dry skin) - $11-$14

This is by far the best foundation I have ever used. It provides medium coverage without feeling or appearing as if you are even wearing a foundation. Easy to blend and extremely build able coverage!


3. Make Up For Ever Smokey Extravagant Mascara Sample - $24

I have been using a sample of this mascara ever since I received it with a Sephora purchase. This is one of the best mascaras I have ever used, and it gives me dramatic lashes that don't fall throughout the day/night. 


4. NYX 'Born to Glow' Liquid Illuminator 01 Sunbeam - $7.50

Perfect for adding a glow to your cheeks, and works great layered underneath #5!


5. Milani Illuminating Face Powder 01 Amber Nectar - $10

Perfect for an overall glow, & can be used as a general bronze/blush/highlight - truly a 3-in-one product!


6. ELF Essential Bronzing Brush - $2

Although I haven't tried many brushes, this one works perfectly to apply powder highlight, bronzer, blush or contour and I use it to apply the Milani illuminating powder!


etsy inspired fall & halloween decor

Fall is hands down one of my favorite times of the year. I love the cooler weather, bundling up in sweater & scarves, staying in and drinking tea and hot cocoa, getting pumpkin spice lattes (!!!) from starbucks, and getting in the halloween spirit entirely too early (it's still just the beginning of september, haha!) 

I was browsing etsy and fell in love with all of the fall themed decor and home items. since I'm a broke college student and can't afford to buy all of these cute items to fall-ify my apartment, I decided to compile a list of my top etsy picks and pretend that I could fill my home. 


Hand Knit Autumn Pumpkins


Charcoal Gray Velvet Pumpkins


Cinnamon Chair Glass Mug Candle


I might accidentally eat this one! 

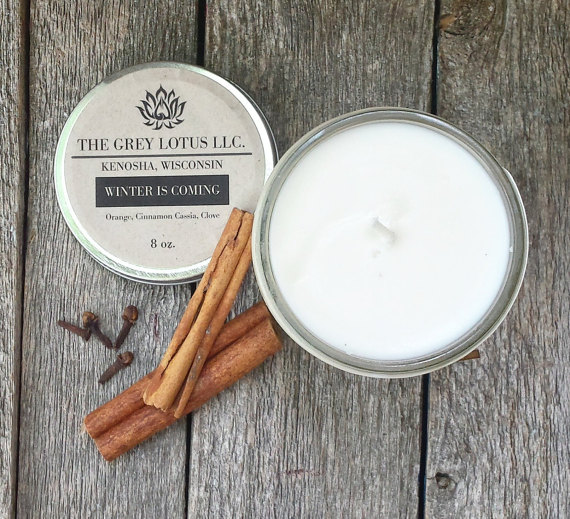
'Winter is Coming' Essential Oil Candle


 Candy Corn Garland


perfect for a fall/halloween themed party!

Halloween Mickey Ears


These are perfect for a trip to disneyland around the halloween season! I've always wanted to go when the decorations are halloween themed, and even heard that they have a special day during october where the park is open all night long. If I were to go around this time of year I would definitely pick up a pair of these ears. 

Monday, September 7, 2015

DIY Bow Pattern Pillow Case


Since I'll be moving into a new apartment in just a couple of weeks, I was inspired to spice up my old bedding to give my living space a slightly different look than last year. I decided to take a old (& unbelievably ugly) pillow + case that we had lying around and create my own case customized to the color scheme and pattern of my old bedding. 

I went to my local fabric store and fell in love with this cute gold and white bow patterned fabric. I actually brought the pillow into the fabric shop in order to measure exactly how much fabric I needed, and ended up only needing 3/4 of a yard since my pillow is slightly smaller than standard sizes. I highly recommend bringing the pillow with you in order to make sure you get exactly how much fabric you need (not too much or too little!) 

Note: The employees at the fabric cutting counter were more than happy to help me measure how much fabric I needed, so don't be shy to ask for help if you're unsure! :-)

Then it was time to transform the fabric into a new and improved pillow case! I began by laying out the fabric on a flat surface, and placing the pillow on top. I wrapped the fabric around the pillow and cut off access fabric. I twisted back around 1/3 inch of fabric on all ends in order to hide frayed edges and the store logo. 

Note: I used white nylon string, which is a bit thicker and stronger than regular string and worked well for this project!


Next, I used sewing pins to pin the fabric down in a straight line and sewed two of the three sides together. Be sure to sew the fabric with the pattern facing inwards in order to hide the stitches! 

Once I was left with just one side open, I turned the fabric right side out so that the bows were facing the outside and touched up any areas that were stitched too loose. You can either stitch the last side closed or simply tuck one end of the fabric into the other (I chose this last option, which is good if you aren't the best at stitching since stitches on this last side will show!)

I simply folded one side of the fabric and tucked it against the pillow, and took the other side of the fabric and tucked it on top of the previously folded fabric. Since this leaves the pillow unsealed on one end, I put 5-8 stitches on the two right and left corners and 2-3 in the center. I recommend linking the part of the fabric that has been folded over to the inner fabric in order to hide your stitches!

PS here is a look at the before and after transformation of this pillow:


                       BEFORE                                                                                                   AFTER


And it's truly as simple as that! I can't wait to add this cute accent pillow to my bedding in my new apartment :-)


Tuesday, September 1, 2015

back to school: supplies & essentials


with september right around the corner, i'm currently in the process of packing up and organizing myself for back to school. one of my favorite parts of this time of year is getting together school supplies and a comfortable yet cute work space. 
here are some back to school essentials i've put together for the new school year:

1. a cute planner/agenda


    ban.do

$20 is definitely pricey and the most i've ever spent on a planner, but as soon as i opened the package i realized that this agenda is worth the cost. every page is unique and each month is full of cute designs. i can already tell that this agenda will make me excited to get organized and plan out my life.

my favorite things about this agenda:


  • sticker page
  • lasts 17-months, starting in august!
  • adorable pattern/details 

2. a pencil case


    ban.do


3. create your own comfortable and cute work space

this year i decided i wanted to change up my work space by adding some cute decorative yet practical items to my desk.

easel, chalkboard memo board + chalkboard pen


    daiso japan

use this chalkboard memo board to keep track of your schedule, leave yourself inspirational messages or reminders.

alphabet stamp + gold ink set


    michaels

when i spotted this stamp and ink set in the clearance isle at michaels i just couldn't resist tossing them into my cart. these can be used to add cute reminders and messages in your agenda!

aaaand that sums up my back to school supply and essential list! cheers to an organized, stylish upcoming school year. xoxo

Friday, August 21, 2015

the ultimate day trip to monterey, ca

there's always the point during summers home from college where you start to get bored of your usual hometown hangout spots. a couple of weeks ago, my boyfriend and i were in the mood for a little road trip. we wanted to just make it a day trip, so we decided to go somewhere we both love but have never been together: monterey, ca. 

we started the trip pretty early in the morning, wanting to beat traffic and make the most of our day there. 
after a couple hours driving down highway 1, two cups of coffee/tea and a couple hours of singing along to the radio we finally reached our destination (!!) we headed straight for cannery row and stopped for burgers and fries at johnny rockets. the diner has a really fun vintage vibe and the food was the perfect way to fuel for the aquarium.

because i hadn't been to the aquarium in a few years, i had completely forgotten how interesting and genuinely fun all the exhibits are. the fact that we are almost 20 and can still enjoy the museum just the same as the 2 year olds really shows how great of a place the monterey bay aquarium really is. 


almost four hours later we had made our way through all of the exhibits (some more than once) and decided to visit dennis the menace park. we got some sno cones from the cute snack shack in the parking lot, and went down the giant (painful) slide. 

afterwards, we walked along fisherman's wharf and sat by the water front to enjoy the rest of daylight. 


we grabbed a couple of iced coffees before we left to re energize for the car ride home. we were sad to leave but all good things must come to an end, and i'm sure that we will be back to visit monterey soon enough!