Monday, July 21, 2014

opening my very own jewelry shop


I couldn't be more excited to announce the official opening of my very own etsy shop. As of right now, I have two earring sets posted and ready to be sold. I'm working on new pieces that will be ready shortly! I have attached some photos of the two earrings that are currently for sale. Be sure to check back for new items in the next couple of days. Enjoy!

My Etsy Shop: https://www.etsy.com/shop/lodiy


Sunday, June 29, 2014

diy decorative sunglasses


When I came across this plain pair of sunglasses with a company logo on the side, I decided to try out my own spin on a DIY sunglasses project I had seen online. The original source of my inspiration had glued beads into an intricate pattern along the edges of the sunglasses, and although I still want to recreate that look, I decided to use a tie-dye pattern seeing as these would be a gift for my boyfriend.

While the steps are fairly simple and self-explanatory, through my own trial and error I have come up with a few helpful tips. I began by printing out a tie-dye pattern online (I recommend searching wallpapers/backgrounds to find some plain, HD photos) and traced the edges of the sunglasses. I found this step to be a bit difficult, particularly the arches and curves as the ends tapper. I ended up trimming down as best I could and glued one end down using Mod-Podge. I then glued the rest piece by piece, trimming down as I went until the entire side was secure. I followed up with around 3 coats of Mod-Podge the seal the paper and left a note along the inner rim.

My boyfriend recently gave these back to me asking for touch-ups to the glue since the edges had started to peal. I went back with another coat of Mod-Podge followed by a layer of clear nail polish. This added some extra shine as well as secured the edges in place (hopefully this glue job lasts longer than last time!)


Saturday, June 7, 2014

chocolate glazed doughnut holes


Due to National Doughnut Day yesterday, my obsession with doughnuts was obviously heightened and I decided to try making my own batch at home. I was unsure as to whether or not I should bake or fry the doughnuts, but in the end decided that frying them would create the most realistic taste, mimicking the doughnuts from our local doughnut shop. 

For the most part, I followed this recipe, however did need to make some slight changes throughout the cooking process. Although the initial ingredients do not call for milk, it quickly became apparent that I needed to add milk and/or water in order to create a dough-like consistency. In the end, I ended up adding around 1/4 cup milk and a bit of water. I also did not fill my pan with as much oil as the recipe called for. I ended up simply flipping the doughnut holes over in order to cook on both sides. 

I recommend dipping your hands in water before molding the dough into bite size pieces, as well as forming all of the "holes" before begging the frying process. I did need to make more icing as I ran out about half way through, and if I were to recreate this recipe I would have simply doubled the icing recipe from the start. 

All in all, these doughnut holes came out better than I expected, and they were competitive with fresh store bought doughnuts as well! Here is an updated ingredients list using the original recipe from Teenage Taste:


Doughnuts:
  • 1 ¼ cup all-purpose flour
  • 1/3 cup granulated sugar
  • 1/3 cup cocoa powder
  • 2 teaspoons baking powder
  • ¼ teaspoon salt
  • 3 tablespoons unsalted butter, melted
  • ½ teaspoon vanilla extract
  • 1/4 cup milk
Icing:
  • 3 cups powdered sugar
  • 4-6 tablespoons milk
  • 2 tablespoon unsalted butter, melted
  • 2 teaspoon vanilla extract

Wednesday, June 4, 2014

diy scented bath bombs


With some friends birthdays coming up, I decided to try out this cute and fairly simple diy project that I saw on pinterest. I followed this recipe that was linked to the Pinterest post, but changed up the ingredients a bit. I made the first few bath bombs using Canola oil as the recipe calls for, however I was curious as to how Coconut Oil would work out. I have found from past diy body and lip scrubs that Coconut Oil leaves skin extremely moisturized. I used vanilla extract and different scented essential oils in combination with food coloring to create these colorful and delicious smelling bath bombs! I left mine in the cupcake molds overnight (over 12 hours), however I did notice that some fell apart when I attempted to pull them out. They were all a bit crumbly at the edges and tops, however some more than others. I think this mishap must be due to different amounts of cornstarch and baking soda used. I started to run low on certain ingredients, but I found that this diy requires specific amounts of both ingredients. If I were to recreate these bath bombs, I would definitely stick to the 2 tablespoons of baking soda and 1 tablespoon of cornstarch.

Featured in photo order from top to bottom:

  • Grapefruit + Coconut Oil
  • Vanilla + Coconut Oil
  • Key Lime + Canola Oil
  • Lavender + Canola Oil


Sunday, June 1, 2014

make your own milk tea


Ingredients: 

  • condensed milk
  • boiled water
  • tea of your choice (I find black tea or fruity herb tea to taste best)
  • milk or almond milk - optional
Directions:
Begin by preparing a regular cup of tea as you usually would (boil water and steep tea bag for a few minutes longer than usual to create a stronger flavor). Place your cup of tea in the fridge and/or freezer until chilled. Add 1-2 tablespoons of condensed milk, depending on how sweet you prefer your milk tea. An optional step would be to add a few tablespoons of regular milk or almond milk. Adding milk in conjunction with the condensed milk will give the tea that special "milk tea" taste. 

This recipe is perfect for those times you are craving milk tea, but don't have many extra calories to spare. Making milk tea at home is the perfect way to control the sugar added to your drink.  

Monday, May 26, 2014

diy decomposition style notebook


Inspired by the decomposition notebooks I've been seeing in stores and online, I decided to make my very own unique and personalized notebook. I loved the idea of added a personal flare to a boring and extremely common notebook. Starting with a blank composition notebook, I created my own collage of photos and magazine cut outs, as well as added a touch of lace tape along the bottom edge. I added a layer of Mod-Podge to ensure that all of the photos remain in tact throughout the school year.

Saturday, May 10, 2014

cute and simple mother's day gift (plus gift wrapping tip!)


I wasn't quite sure what to get my mom for mother's day this year, especially since her birthday falls within the same week. My mom tends to appreciate gifts that are hand-made and come from the heart over a generic store bought gift. However, the creative juices just weren't flowing and as of yesterday I still could not figure out what the main part of her gift would be. I went to Goodwill in hopes that something there would spark an idea and that's exactly what happened. I found a stack of old coasters with peeling edges and a rather ugly floral pattern for around $2. I bought them with the thought of renovating them into cute and personalized coasters my mom can use while she drinks her morning coffee (after all, I need to make sure she thinks of me every morning while I'm away at college). The process is fairly simple:

Cut out different magazine clippings or even some old family photos of you and your mom. Taking a foam brush, coat the base of your object (since this process can be used to make more than just coasters!) and begin to glue down your photos. wait for everything to dry before coating the entire thing in a few layers of Mod-Podge. This will create a hard, almost laminated surface to ensure that any remnants of drinks won't bleed through and ruin your photos! 


I tied the stack of coasters together with a ribbon and placed them into a cardboard box with the rest of her gifts. After wrapping the gift up, I glued down a heart doily to the edge of the box to add a cute and personalized touch. 


Sunday, April 27, 2014

crafty way to store your letters︱diy letter book


Originally finding this diy from Pinterest, I decided to try it out and recreate my own version. I had a box full of old birthday cards, letters from friends and family, postcards, etc. and figured that this would be such a cute and crafty way to save space and keep all my special notes in one place (this will be especially convenient for when I move into my dorm room). The actual diy is very basic. Simply begin by hole punching the end of each envelope opposite of the flap. Using two (or three depending on how large the envelopes are), loop each letter through and secure. I think it would also be cool to collect postcards from your travels or ones that have been sent to you and attach them all together in time order. This is about as easy as any diy gets, but it's such an efficient way to preserve memories without the clutter. Place the letter book among other books on a bookshelf and your memories will always be accessible. 

Thursday, April 17, 2014

the only four photo editing apps you need


The amount of photo editing apps available in the app store is steadily increasing, and it seems as though most apps serve the same purpose with varying efficiency. It's vital to minimize the amount of apps downloaded to your device in order to maximize storage space. Due to my slight Instagram addiction, I have tried out a number of apps and have reduced my photography apps to the only four photo editing apps I find useful:


1. Squaready
Squaready is particularly useful for uploading a full sized photo without having to crop to the standard Instagram square size. Simply upload your photo and adjust to fit the entire thing by adding borders (this allows you to create those white borders). 
Free in the App Store


2. Latte Camera
My favorite part about Latte Camera is the ability to adjust the intensity of the filters. I find that a lot of apps have really great filters but most of the time they are too powerful, and I like to layer subtle filters to achieve a perfect photo. Another feature I love is the light leaks with intensities that are adjustable as well!
Free in the App Store


3. PhotoCat
I use PhotoCat in combination with Latte Camera, using the adjustable filters feature to mix and layer different filters until I achieve the look I'm going for. 
Free in the App Store


4. Afterlight
Since this app costs money, its feature tend to outshine the free apps that are available in the app store. AfterLight has the more filters than the previous two apps and possesses a similar adjustable intensity feature in combination with different light leaks and effects as well. 
99cents in the App Store


Sunday, April 6, 2014

a bucket list


As my 18th birthday approaches and I'm making some very momentous decisions in my life, everything is seeming to come into focus recently. For the past year many aspects of my future were up in the air, and although nothing is certain at the moment, I'm finally content with not knowing the details of what lies ahead. This new found shift in perspective alongside the sudden realization that adulthood is just around the corner has forced me to think about where I see myself in the upcoming years. Although like most others I would like skip ahead 5 years and find myself happy and carefree, fully supported by a well paying job doing something I love and fulfilling my passions in life, I know that this is neither possible nor likely. While I may not be able to control such general aspects of my life, I want to be sure to fulfill the smaller tasks that make me happy on my way to that perfect fulfilled life. This is my bucket list that will hopefully guide me throughout my upcoming years and remind me to find happiness in the small things in life, regardless of how blurred or frightening the future may seem at times. 


  1. Go to The Wizarding World of Harry Potter
  2. Bake a successful batch of macaroons
  3. Learn to cook
  4. Learn Arabic
  5. Jump off of a diving board
  6. Go to a drive-in movie theater
  7. Learn to drive a truck 
  8. Travel (Greece, France, England, Italy, Egypt, Spain, Germany, etc)
  9. Meet someone named Holden
  10. Spend an entire day at the library reading (from opening to closing)
  11. Write a short story
  12. Compose a book of poems
  13. Be published in a magazine, book, etc
  14. Learn to play guitar
  15. Go on a road trip
  16. Be a tourist in my own town
  17. Get to know my parents as people rather than parents
  18. Create my own business
  19. Go to high tea
  20. Start selling my jewelry
  21. Reread the entire Harry Potter series
  22. Movie hop 
  23. Go on a spontaneous trip to the beach
  24. Go night swimming
  25. Rewatch the entire series of Gilmore Girls
  26. Take a class at the Rec Center I know nothing about
  27. Go on a legitimate hike
  28. Take a yoga/Pilates class
  29. Attend a wedding
  30. Be a bridesmaid
  31. Be a maid of honor
  32. Smile at strangers
  33. Meet someone at a coffee shop (shout out to Taylor Swift's "Begin Again")
  34. Wear a mascot uniform of some sort
  35. Make my own sushi
  36. Finally watch the Titanic
  37. Learn all the states and their locations (Sadly, I don't know an embarrassing amount)
  38. Learn to shoot a gun
  39. Go out for chocolate fondue
  40. Beat my boyfriend at a video game (Has only ever occurred twice)
  41. Go Ice Skating in Downtown San Francisco
  42. Go to an amusement park
  43. Road trip to Disney Land
  44. Meet Peter Pan, Mickey Mouse and Princess Ariel 
  45. Adopt a puppy
  46. Get over my fear of cats
  47. Go to the snow
  48. Learn to ski and/or snowboard
  49. Build a snow man
  50. Run in a color run or charity marathon

diy pearl bobby pins


Supplies

  • pliable jewelry wire
  • jewelry pliers
  • scissors or jewelry shears
  • pearl beads
  • bobby pins


Directions

Begin by cutting 2"-3" sections of wire, making sure to allow room to grip the wire later on as you wrap it around the pin. Starting from the edge of the wire, clamp your pliers onto the wire and twist around the rounded base until you have created two to three small loops. This will act as a base to secure the pearl bead in place. Next, slide the pearl bead onto the wire and bend so that the loops sit flat against the bead. Taking the untouched end of the wire, wrap once around the wire itself, then a few times around the bobby pin, making sure the pearl is safely secured. I recommend pulling the wire taut after each time you wrap the wire around. Once you have secured the pearl to the bobby pin, cut off any remaining wire using the jewelry shears or scissors.


Friday, April 4, 2014

diy tea cup candles


 Supplies:

  • tea cup (Goodwill)
  • candle wicks (Michael's)
  • pencil
  • yarn and/or tape
  • candle wax (Target)
  • scent (optional)
Depending on the height of your tea cup, you will need to cut the candle wick accordingly. I found short wicks at Michael's, however the regular length wicks can simply be trimmed down to size. The candle wax I used was a mixture between wax squares intended for use with a wax melting kit and the remnants of a few old candles that could no longer be burned. Quick tip - place candles in the freezer for a couple hours (this will allow the wax to harden) and cut/scoop out wax with a knife. I mixed a few chunks from miscellaneous candles along with the wax squares, placing them in a small handheld pan just resting on the surface of a larger pot of boiling water. Make sure that the smaller pot in not submerged in the boiling water. This layering with ensure that the wax is not directly faced with the heat and therefore will not burn. If desired, stir in any scent or essential oil you would like to add a scent to your candle (the wax squares I picked up from Target were already scented). 


Prior to melting the wax, set up the teacups and candle wicks so that you can quickly pour the wax before it hardens. In order to ensure that the wick remains straight, either tie or tap the wick in place by balancing a pencil across the width of the cup and securing the wick to the pencil. Simply pour the wax into the cup (I recommend making use of another set of hands and asking someone to hold the pencil and wick in place while you pour, or vice versa). Allow the wax to dry overnight, but be sure to save some extra wax for the following day. As the wax dries, a gap will form in a crevice surrounding the wick. Fill this gap by melting a proportionate amount of wax and simply filling the gap.


Thursday, April 3, 2014

diy decoupage trays


What You Need:
  • magazine clippings, scrapbook paper, etc.
  • trays ready to be decorated (I found mine in a pack of 5 for 99 cents at my local Goodwill)
Directions:
Begin by cutting out your desired magazine clippings or any other picture you would like. Next, map out your desired layout in order to be able to glue down background clippings first. Once you are ready to start gluing, using Mod-Podge and a foam brush, glue down your pieces. For my book page tray, I glued down the center of the page to the tray and allowed it to dry. I cut the remaining paper and glued down the edges to the tray. Once you have glued down your paper to your desired design, apply 2-3 layers of Mod-Podge to create a protective layer. Use these cute decorative trays around your house to hold your jewelry, keys, etc. 


diy three-tier jewelry stand


Supplies:

  •  3 (mis)matched bowl/dish of gradually decreasing size
  • 2 candle holders
  • super glue
Directions:
Begin by taking the third and largest dish and placing one of the candle sticks in the center (I got all of my dishes and candle sticks at my local Goodwill)-- Apply glue and allow to dry. Repeat this step with the following dish. Once you reach the third dish, apply glue to the top of the candle stick and glue down the final dish. 
This three-tier jewelry stand is a perfect way to organize your earrings, rings, watches, hair clips, etc. 


Saturday, March 29, 2014

current music favorites


neighborhood #1 (tunnels) - arcade fire
on paper - arkells
never gonna give you up - the black keys
little black submarines - the black keys
the girl - city and colour
in repair - john mayer
wild fire - john mayer
camera talk - local natives
airplanes - local natives
ribs - lorde
biting down - lorde
dead sea - the lumineers
the way i was - maroon 5
adore you - miley cyrus
think you can wait - the national
diane young - vampire weekend
everlasting arms - vampire weekend
carry on my wayward son - vitamin string quartet
what you know - two door cinema club
wake up - two door cinema club

Wednesday, March 26, 2014

the benefits of tea

I recently came to the realization that I have been drinking at least one cup of tea every single day for a year or so now. Although I've been drinking tea since I was a kid, I never drank it so regularly until now. I always assumed that tea wasn't the best daily drink option due to the caffeine, but I stumbled across a few articles such as this one that informed me otherwise. Apparently black, white, green, and herbal teas are full of all sorts of health benefits, differing depending on the type of tea. Tea is definitely my favorite morning, afternoon and evening go-to drink, and now I won't feel guilty since it's healthy after all!

a few of my favorite go-to teas:
PG Tips
Yorkshire: Black, Green
Tazo: Earl Grey, Calm

Monday, March 17, 2014

diy brown sugar & coconut oil body scrub


ingredients:

  • 1 cup brown sugar
  • 1 1/2 tablespoons coconut oil
  • white sugar (optional)
If using hardened coconut oil, melt in glass bowl in the microwave in 5-10 second intervals. Mix in the brown sugar and/or white sugar, folding them over the melted oil. Place the finished product in jar and leave it inside your shower- It's that easy! This can be used as either a body scrub or an abrasive face scrub. Enjoy!

Thursday, March 13, 2014

diy decoupage memory jar


Decoupage Memory Jar


Start out with an empty glass/mason jar. You can even reuse any type of empty food container that has been washed. Gather your decoupage supplies- cut out magazine clippings or other types of decorative paper that would like to use. Take a paintbrush (preferably a sponge-tip applicator) and coat the inside of the jar with Mod-Podge. I recommend beginning with a small area at a time and slowly working your way around the jar, adding more glue as you are ready to apply the paper (that way the glue won't dry before you've had time to reach that spot). Start out by gluing down the pieces you would like to be seen from the outside of the jar first, and layer the background pieces accordingly. Once you have glued everything down, wait for it to dry before applying an additional 1-2 coats of glue to the inside of the jar. This will create a seal along the inside of the jar so the paper won't bend or come loose, and the items you place in the jar won't ruin the decoupage effect. I also decided to decorate the cover to my jar using the same process as the inside of the jar, making sure to seal the cover with an extra couple coats of Mod-Podge. 


Fill up your jar with items of your choice! I decided to use mine as a memory jar for 2014. I cut out small pieces of paper and write down memories that stand out to me or small things I want to remember. At the end of the year, I will be able to look back and revisit all the things that made me happy throughout the year! My jar is also sprinkled with paper hearts, random fortunes from Chinese restaurants, mismatched/broken earrings, and other miscellaneous items. 


diy mini decorated clothes pins


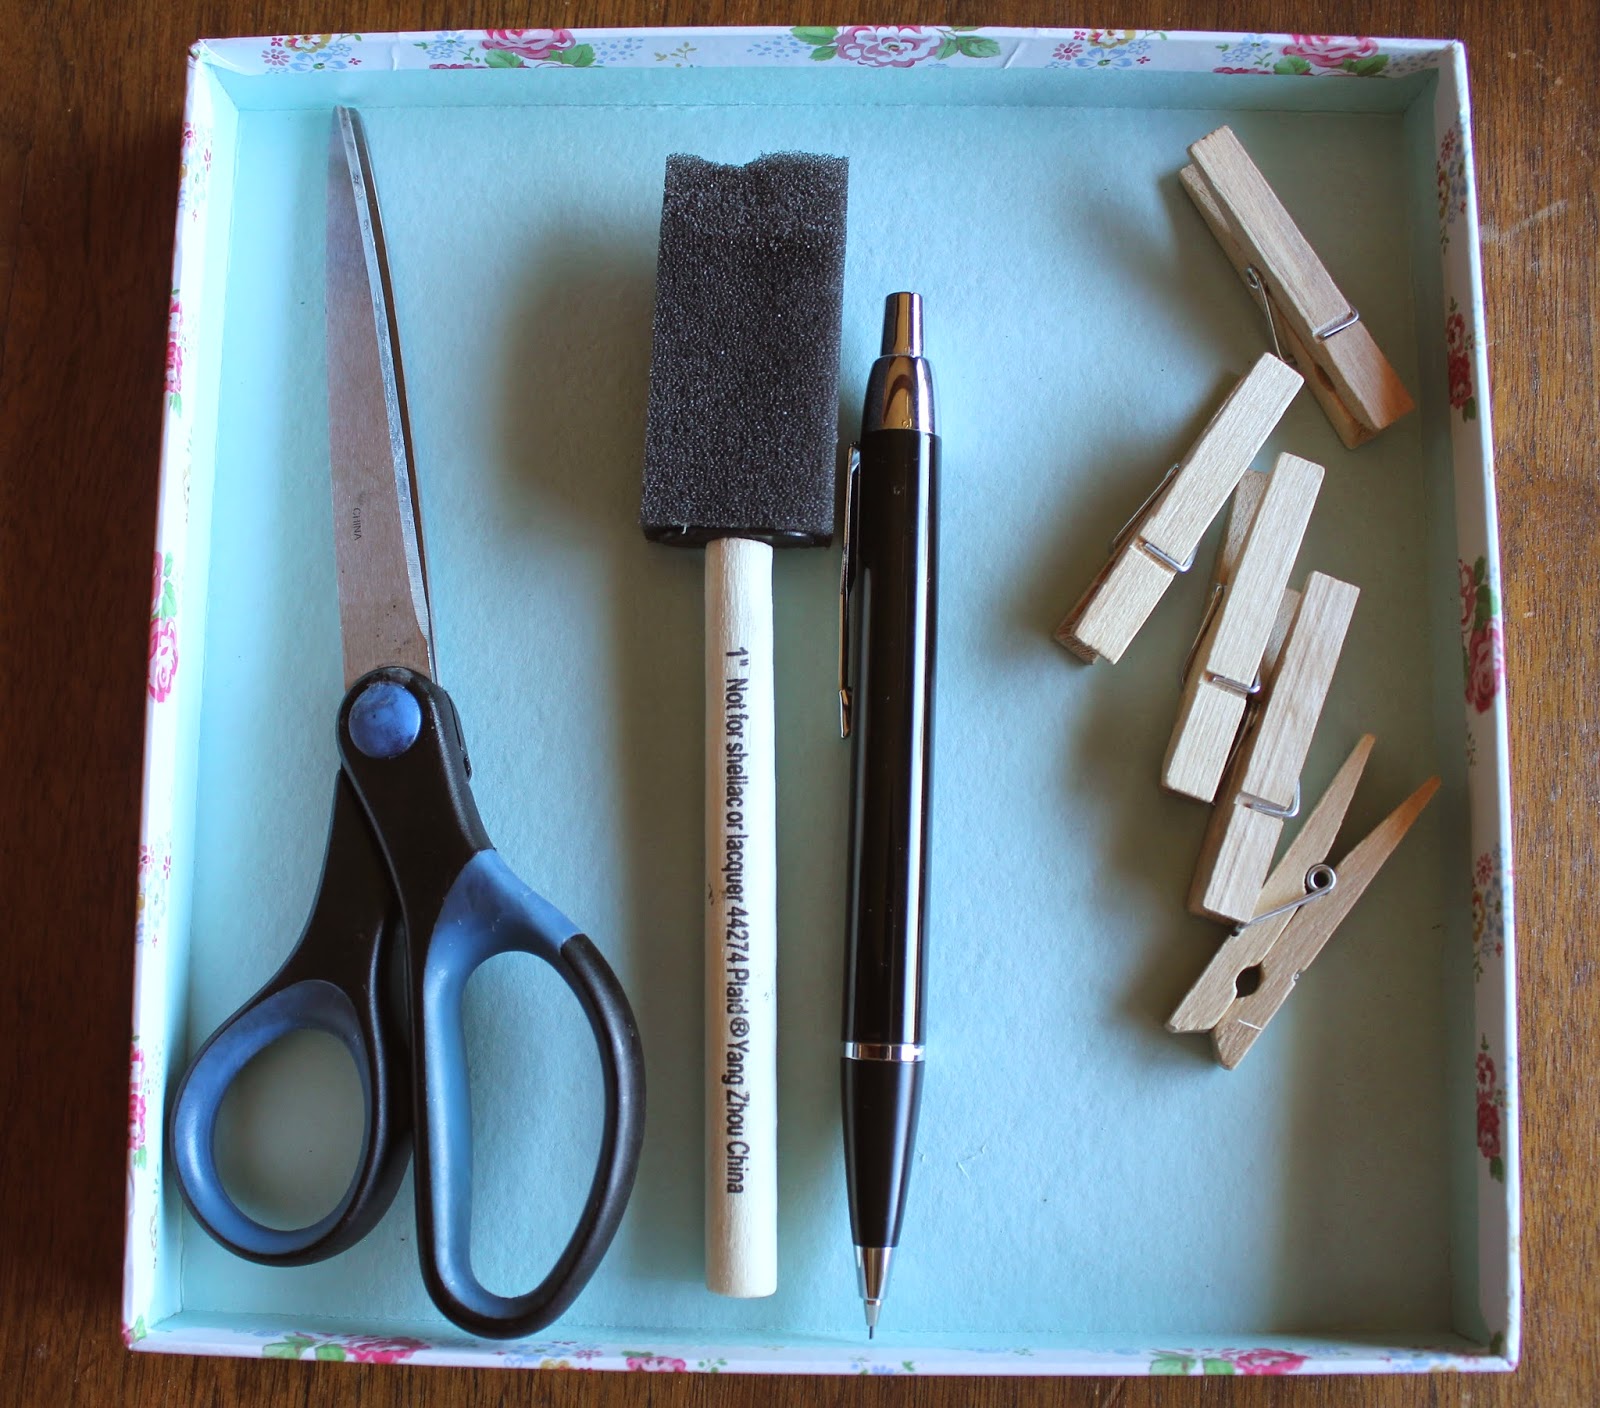
Supplies:


  • Plain Mini Clothes Pins 
  • Decorative paper, magazine clippings, etc
  • Mod-Podge
  • Scissors
  • Pencil/Pen
  • Foam Brush


Start off with your plain clothes pins (I got mine in a pack of 20+ from the dollar store!). Next, decide how you want to decorate your pins. The possibilities here are pretty unlimited. I used different mediums to make mine - magazine clippings, lace tape, yarn, scrapbook paper, fabric, etc. (I think it would be interesting to try out glitter!) Trace the outline of your chosen medium to the shape of the clothes pin and cut out. For the paper materials (or if you decide to try this out with glitter) apply a coat of Mod-Podge to the clothes pin, stick material, and let dry. Apply another 1-2 coats of Mod-Podge to seal paper and create a glossy finish. And that's it! I used these to pin photos of family and friends along a string of photos above my bed!